
In this article, we will be implementing something fun. We will be implementing drag and drop in Vue. I know there are a whole lot of libraries out there that will help you set this up but it’s always a good idea to understand how it’s working under the hood.
Since it’s a very small application, we won’t be making use of the Vue CLI, rather we will be using the Vuejs script tag. This also gives us all the abilities our CLI would give us.
Ready to use Vue Templates
If you are building a web application in Vue, I would recommend checkout ready-to-use Vuejs Templates to download and use for your project. As they come with nice-looking interfaces and also they are easy to customize. They can save you lots of time, which you need to spend creating a user interface for your app. Do check out the best vue templates from WrapPixel. WrapPixel is known for providing high-quality admin dashboards in Vue, Angular, React, and Bootstrap Frameworks.
We will start implementing drag and drop in vue by setting up our project directory, We will create a folder in our desktop directory, This is where we will be setting up our application.
Basically, we will need just two files, an index.html file and a main.js file. All our template codes will go to the index.html file and all our Vuejs codes will go to the main.js file.
Drag and Drop in Vue
Vue Drag and Drop Image Upload
To do this open up your terminal and type the following:
cd desktop && mkdir vuedragndrop && cd vuedragndrop
touch index.html && touch main.js
code .
This command will create these files inside our directory and open up the directory in VS code.
We will start by modifying our index.html file by adding the custom HTML 5 boilerplate and then add the Vue script tags:
    <!DOCTYPE html>
    <html lang="en">
    <head>
        <meta charset="UTF-8">
        <meta name="viewport" content="width=device-width, initial-scale=1.0">
        <title>Document</title>
        <script src="https://cdn.jsdelivr.net/npm/vue"></script>
    </head>
    <body>
        <div id="app">
            {{message}}
        </div>
        <script src="main.js"></script>
    </body>
    </html>
We start by defining the HTML 5 boilerplate and the add the Vuejs script tag in the head tag, this will initialize Vuejs immediately when the page is loaded. We then create a div with an id of the app, this is where we will be writing all our Vuejs code. You have to run your application on a live server. You could use NPM to install any live service of your choice.
After doing this we need to create the Vuejs instance in our main.js file:
var app = new Vue({
    el: '#app',
    data: {
        message: 'Hello Vue!'
    }
})
We use the new Vue() method to create an instance of Vuejs and then define the message data property that we reference in our index.html file.
We will create a simple user interface that will show the drag and drop point. Add the following markup inside the div with the id of app :
     <div id="app">
            <div class="container">
                <h4>Drag and Drop here</h4>
            </div>
            {{message}}
        </div>

And then add this styles in the head tag:

     <style>
            .container {
                width: 350px;
                height: 350px;
                border: 2px dotted gray
            }
            .container h4 {
                text-align: center;
                font-family: sans-serif;
            }
        </style>
After doing this you will have this result:

Add data property
We now have to add a data property that will hold our files that have been dropped on the box. To do that add below to the data property in the Vue instance:
files: [],
After that, we will add a @drop event that will select our files and also a v-cloak attribute that is used in hiding {{tags}} before the app load.
Now our div should look like this:
 <div class="container" v-cloak @drop.prevent="addFile" @dragover.prevent>
    <h4>Drag and Drop here</h4>
 </div>
We need to define the addFile the method in our Vue instance. To do this we will create a methods object in the Vue instance that will hold all our Vuejs methods:
 addFile(e) {
      let files = e.dataTransfer.files;
      [...files].forEach(file => {
        this.files.push(file);
        console.log(this.files)
      });
    }
After doing this, Open up your console and try dragging and dropping a file inside the box. Doing this will log the file details inside the box.
What we can do is display the selected images inside the box using the <li> tag. Let’s add that feature by modifying the codes to this:
     <div class="container" v-cloak @drop.prevent="addFile" @dragover.prevent>
        <h4>Drag and Drop here</h4>
        <li v-for="(file,id) in files" :key="id" class="list-group-item mb-3 border-top">
        {{ file.name }} ({{ file.size }} kb)
        <button>Remove</button>
     </div>
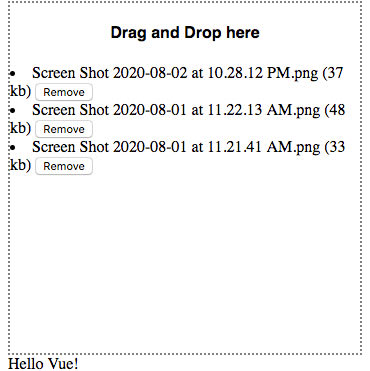
Now if you drag and drop a file, You will get the file name and the file size.
Remove images from Drag and Drop in Vue
We can also add a method that will remove a file from the files array by adding a method to the remove button:
<button @click="removeFile(file)">Remove</button>
And then create the removeFile the method inside the methods object:
 removeFile(file) {
      this.files = this.files.filter(f => {
        return f != file;
      });
    },
With this, You can now remove any file from the files array.
Let’s go the extra step by creating a Vuejs filter that will form at the side of each file. Create a filter object and add this method:
 filters: {
    kb(val) {
      return Math.floor(val / 1024);
    }
  },
Basically what this will do is divide the size of our file by 1024 to get the actual size. To use a Vuejs filter you have to pass a pipe to use it by doing this:
{{ file.name }} ({{ file.size | kb }} kb)
Styling up our Drag and Drop in Vue with Bootstrap
To make our user interface look better, we can add the bootstrap CSS CDN and also google fonts into our application. Let’s modify our HTML head to this:
 <head>
    <meta charset="UTF-8" />
    <meta name="viewport" content="width=device-width, initial-scale=1.0" />
    <title>Drag and Drop</title>
    <link
      href="https://fonts.googleapis.com/css2?family=Kumbh+Sans&display=swap"
      rel="stylesheet"
    />
    <link
      rel="stylesheet"
      href="https://stackpath.bootstrapcdn.com/bootstrap/4.5.2/css/bootstrap.min.css"
      integrity="sha384-JcKb8q3iqJ61gNV9KGb8thSsNjpSL0n8PARn9HuZOnIxN0hoP+VmmDGMN5t9UJ0Z"
      crossorigin="anonymous"
    />
    <script src="https://cdn.jsdelivr.net/npm/vue"></script>
    <style>
      * {
        font-family: "Kumbh Sans", sans-serif;
      }
      .wrapper {
        width: 350px;
        height: 350px;
        border: 2px dotted gray;
      }
    </style>
  </head>
With this added we can now modify our markup to this:
     <body>
        <div id="app">
          <nav class="navbar navbar-light bg-info">
            <div class="container">
              <a class="navbar-brand" href="#">Vue Drag and Drop</a>
            </div>
          </nav>
          <div class="container">
            <div class="row mt-4">
              <div class="col-md-6 offset-md-3">
                <div
                  class="wrapper px-2"
                  v-cloak
                  @drop.prevent="addFile"
                  @dragover.prevent
                >
                  <h4 class="mt-3 text-center">Drag and Drop here</h4>
                  <ul class="list-group">
                    <li class="list-group-item" v-for="(file,id) in files">
                      {{ file.name }} ({{ file.size | kb }} kb)
                      <button
                        class="btn btn-danger btn-sm float-right"
                        @click="removeFile(file)"
                      >
                        x
                      </button>
                    </li>
                  </ul>
                </div>
              </div>
            </div>
          </div>
        </div>
        <script src=" main.js"></script>
      </body>
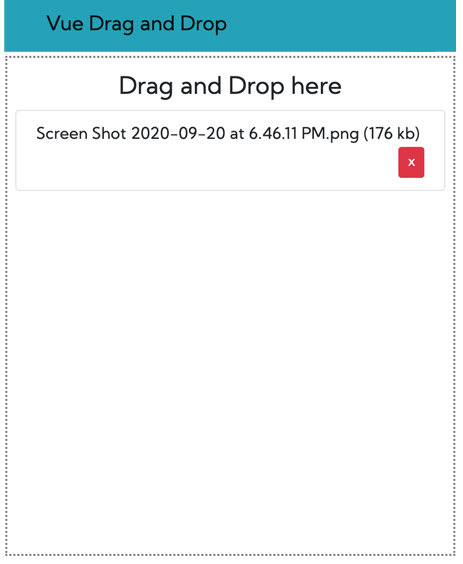
Now your application should look like this:
Improving Vuejs Apps with Vue Filters and its Alternative (Vue Computed Properties)
If you are looking for VueJs Admin Dashboard Template then you can check out below useful Admin Template which can save you time, money, and energy:
Modernize Free Vuetify + Vue js Admin Dashboard


I good !!